Automating your desktop workflow for 360 product photography
For the creation of 360 product photography, we at PhotoSpherix work on Mac computers and we create our 360’s through Garden Gnomes Object2vr. This has worked great through the years for creation, but when we moved to a more automated environment for some of our clients, we ran into troubles.
We started looking at the whole workflow and not just the 360 view creation and came up with a few ideas that have helped reduce the time and increase productivity.
The Simple Workflow
- Product enters the building
- Products are sorted and organized based on the day’s photography
- Products are prepped for photography
- Products are bar code scanned
- Product is mounted
- Photographed
- Repacked
- Files are delivered to processing machines
- 360 view is created
- The animated gif is created
- mp4 is created
- The image sequence is created
- Files are named from SKU to the preferred filename
- Files uploaded to the server for review
- Files delivered to the client
- The product is shipped back to the client
Now for a few products a day, this was never an issue, we just did everything by hand. Once we started photographing over 100 products a day, we found that we had just as much manpower in the process as we did in the creation, and this is not what we stand for here at PhotoSpherix. We want to spend most of our time working on great product photography and not on shipping files and renaming things. Enter Apple Automator and some Linux coding along with the customers supplied Excel documents to the rescue.
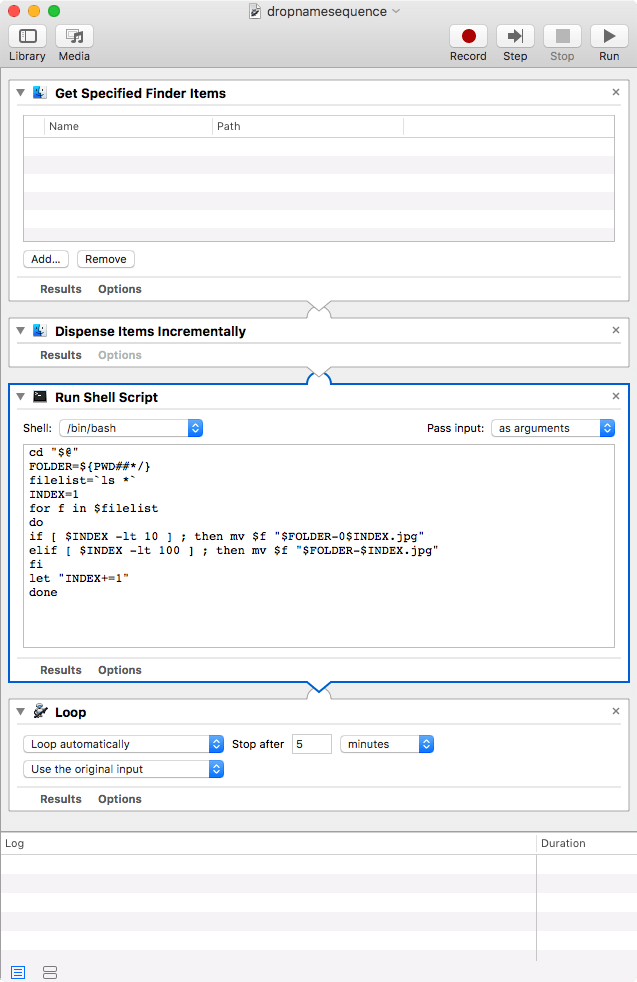
For the longest time, we have used a couple of simple scripts that saved a lot of time. The first of these is a script that takes all of the images in a subfolder, names them to the name of the folder with a sequence number after it. As you can see this is a simple script that does one thing. Take a folder that is dropped on it and work through it, item by item and rename the items. This works great, again for a few 360s but not for a large batch. On top of this, the images that come out of Object2vr are not padded numbers so they had to be hand renamed to fit the pattern.
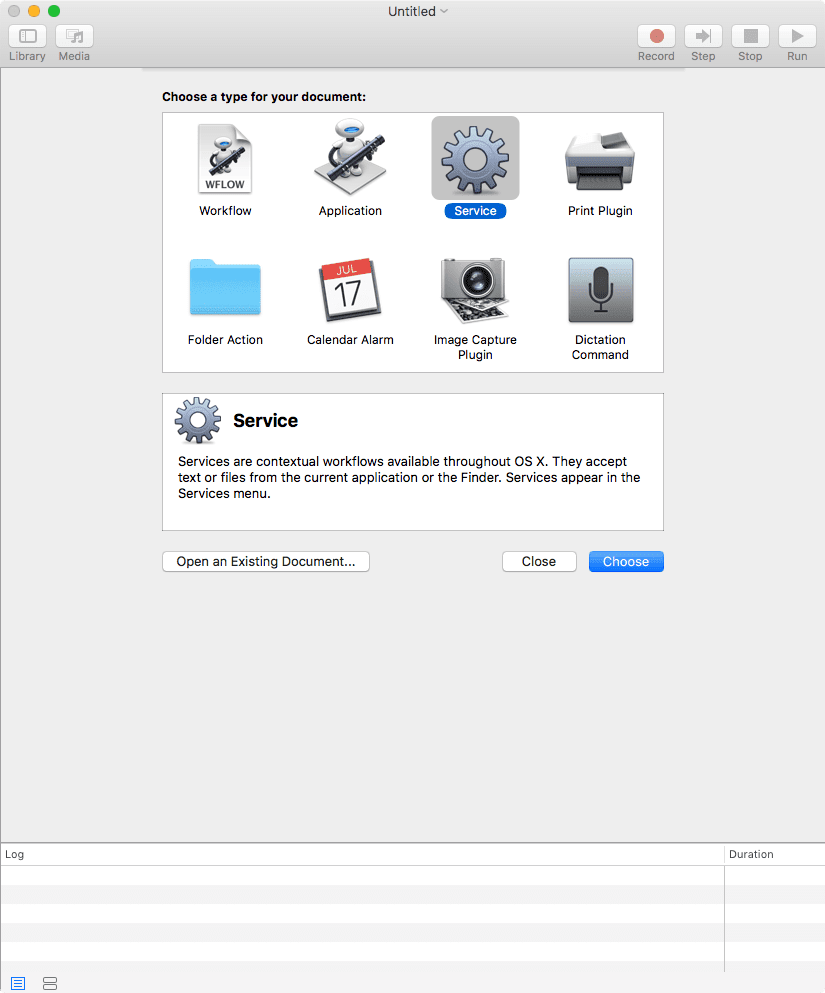
The first upgrade to this script was to make it into a service so that you could right-click the folder and have the process run. This was an improvement, but still, you are limited to a single folder, and as I said earlier, this is not what we want to do all day. Why have an okay script when you can make it do it all.
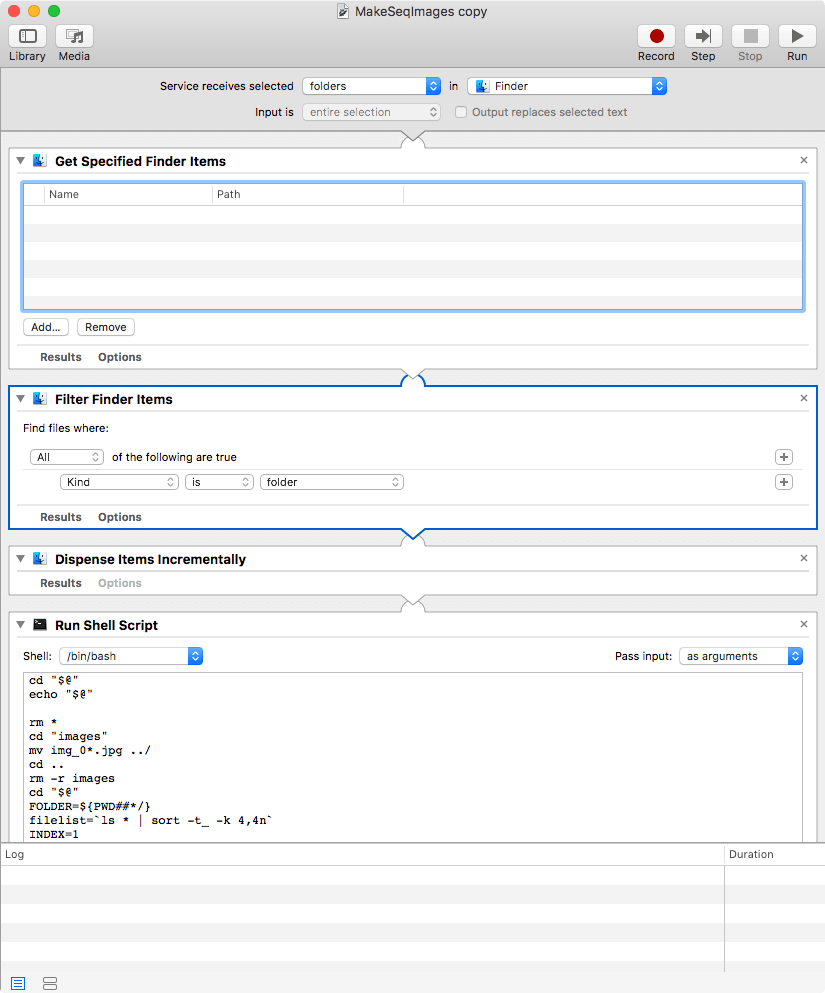
By adding a filter to the MULTIPLE selected items along with a “Dispense Items Incrementally”, we are now able to work with multiple folders at once. This has made it possible to click once, instead of click 100s of times. We are moving forward and getting closer.
Now we need to work on the issue with the names of the images in the folder. They come in as img_0_0_0.jpg, img_0_0_1.jpg, img_0_0_2.jpg through 24 in an images folder in a parent folder that is the named the same as the barcode. It will always be this way and the only change is the number of images so the second number. After a little searching, a Linux list command found a way to sort the list in the correct order, but we have other items in the folder. A little work was needed first. Step one. Delete everything except the images folder. Step 2 move the images that we are looking for out of the folder. Step 3 delete the images folder.
OK, a folder that is named correctly with our images in it. Now we can rename them. A short ls command with a sort made it possible to cure the non-padded number issue with the images. Long and short, list files as we see them in the Finder.
filelist=`ls * | sort -t_ -k 4,4n`
Now just rename with the folder name.
rm *
cd “images”
mv img_0*.jpg ../
cd ..
rm -r images
cd “$@”
FOLDER=${PWD##*/}
filelist=`ls * | sort -t_ -k 4,4n`
INDEX=1
for f in $filelist
do
if [ $INDEX -lt 10 ] ; then mv $f “$FOLDER-0$INDEX.jpg”
elif [ $INDEX -lt 100 ] ; then mv $f “$FOLDER-$INDEX.jpg”
fi
let “INDEX+=1”
done
## begin gif and mp4 creation
theargs=”$@”
files=${theargs##*/}
name=${theargs##*/}fullpath=${theargs}/
outsidepath=${fullpath%/*/}/usr/local/bin/convert -delay 15 -loop 0 -scale 600×600 -fuzz 5% -deconstruct +dither -colors 90 -remap +set comment ${fullpath}*.jpg “${outsidepath}/${name}.gif”
/usr/local/Cellar/ffmpeg/3.0.2/bin/ffmpeg -loop 1 -framerate 10 -i “${outsidepath}/${name}/${name}-%02d.jpg” -movflags faststart -pix_fmt yuv420p -vf “scale=600:-1” -loglevel quiet -t 00:00:15 “${outsidepath}/${name}.mp4”
While we are here, let’s just create a GIF and an MP4. Using Convert, we are able to create the GIF and then FFmpeg to make the MP4. All done.
What is nice about doing this simple script is that it has made it possible to take a completed folder of 360s and process them after hours. We no longer need to be at the machine to do these simple but repetitive steps. Adding this upgrade to our LED Hotlamps has made it possible to further increase our throughput.
In the next post, I will be talking about bar code scanners and how to reduce data entry and data entry errors.




Leave a Reply
Want to join the discussion?Feel free to contribute!